Installing CentOS 7.0 with Bootstaller
Brightbox provides standard images for Windows and several Linux distributions. That’s great if you want to get going quickly or have systems that are designed to work on standard images.
But sometimes you need to build something bespoke and that can be a bit fiddly on a cloud.
To solve this problem, we put together the Brightbox Bootstaller. Bootstaller allows you to launch the standard installer for CentOS, Debian, Fedora and Scientific Linux and configure the server just as you like it.
This guide will go through using Bootstaller to install CentOS 7. First things first, get signed up and logged into Brightbox Manager.
Create the server
Click Cloud Servers
in the navigation bar on the left and then click the New Cloud Server
button on the right.
This pops up the New Cloud Server
dialog.
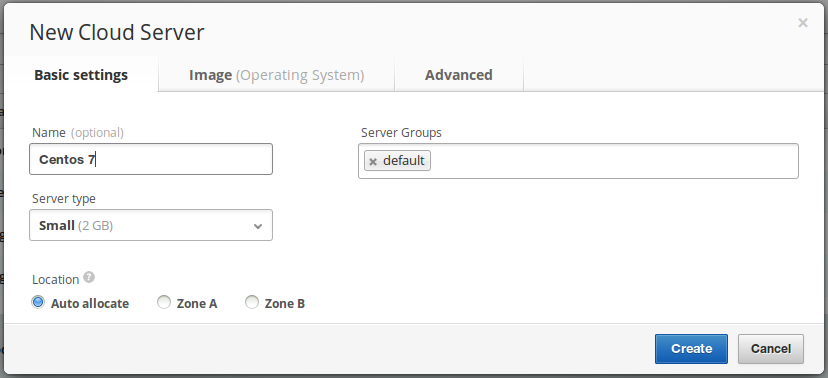
Give your new server a descriptive name like Centos 7
and change the Server Type to whatever you require - I’m going to use a 2GB RAM Small.
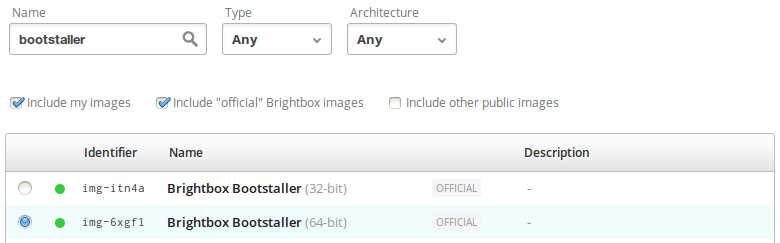
Now click the Image
tab and search for “bootstaller”
to find our official bootstaller images - choose 32bit or 64bit as you require.
Open the graphical console
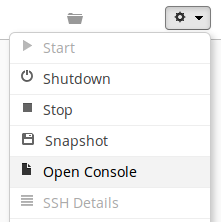
Once the server goes into active
state, indicated by the green circle, we want to open the graphical console. Click the server’s action menu (signified by a little cog) and click Open Console
.
This will popup a new window (make sure your browser doesn’t block it) and give you access to the server, as if you were sat at the keyboard and screen.
And it should have booted into the Bootstaller menu, where you can select which operating system you want to start the installer for.
Installing CentOS 7
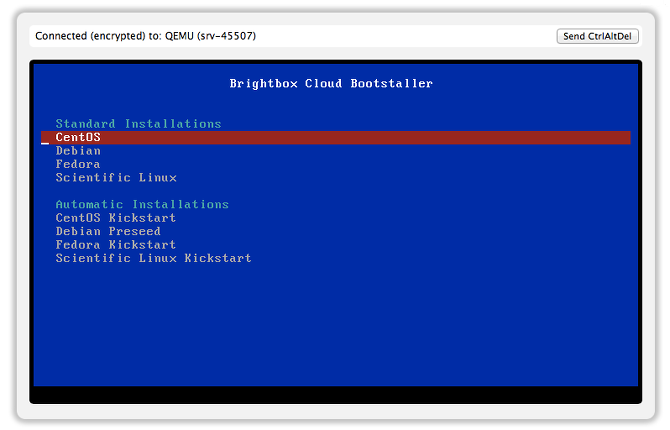
If you want to get up and running quickly and don’t have any custom requirements then select CentOS Kickstart
which will run an automated installation that shouldn’t require you to make many decisions.
If you want finer control of your installation, such as the exact partition setup or package selection, select the standard CentOS
install option.
Whichever you choose, the CentOS network installation process will begin - it will look pretty much just as if you were installing from the CD/DVD.
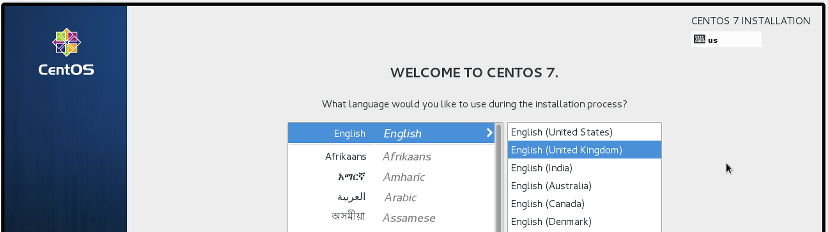
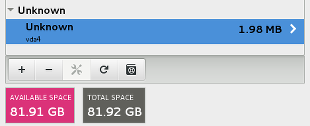
If you choose the non-kickstart installation, then be sure to configure partitioning manually and remove the bootstaller partition (which will be something like 1.98 MB) as it’s not needed after install.
Cloud IPs
Once installation is complete, you can map a Cloud IP to the server (if you don’t have IPv6) and ssh right in using the root password you chose during installation!
ssh root@public.srv-xxxxx.gb1.brightbox.com